How to Install a Continuous Duty Solenoid to Charge a Battery
DoItYourselfRV's 'Build Your Own Camper Van' series continues with this article onhow to install and wire secondary house batteries in your van.
Previous topics in the series include:
- Purchasing and prepping you van
- Insulating and paneling the living area of your van
Battery Installation: How to Get the Juice Flowing
The first step to powering up your van camper is to install secondary batteries that are charged off your van's alternator.
You want these secondary batteries to be separated electrically from the alternator when the motor is not running. You can buy fancy electronic battery isolators for prices up to and over $100.
Battery isolators will prevent your draining the main vehicle battery when appliances are connected to the secondary batteries. You never want your vehicle battery to be doing the work that the secondary batteries should be doing.
Electronic isolators are getting harder and harder to find nowadays because modern vehicles have such complicated electronics. And electronic isolators often cause mysterious problems and may not work at all.
Fortunately, there is a much simpler and more reliable method to isolate the secondary batteries while they're in use.
By installing a continuous duty 12 Volt DC solenoid, or relay, you will protect your vehicle's battery from needless and dangerous draining while still being able to charge your secondary batteries off the alternator while the engine is running.
The relay will only energize when the ignition is turned on and the engine is running.
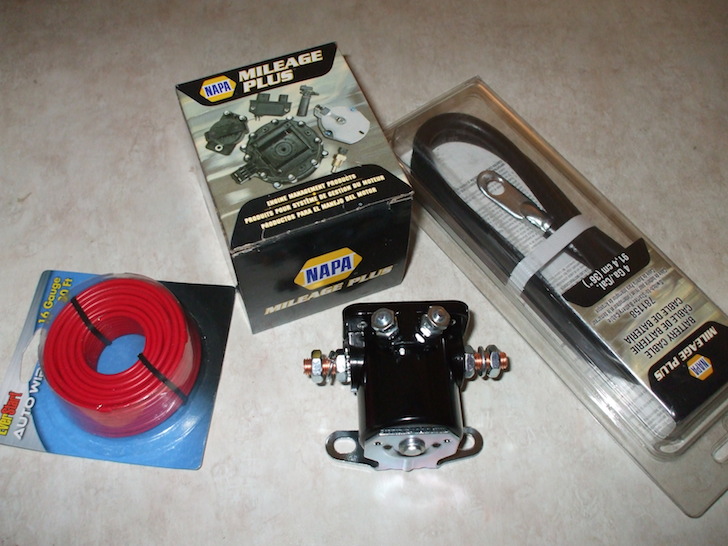
Continuous duty 12 V direct current (DC) solenoid
The solenoid will allow the secondary batteries to charge while you're driving. When the ignition is turned off, the solenoid will disconnect the charge line, isolating the secondary batteries from the van start battery.
How to Install the Secondary Battery System Solenoid
Don't confuse the van's starter solenoid with the additional solenoid for your house batteries.
The starter solenoid has a separate function and isn't related to the installation of your house battery solenoid.
A starter solenoid is only energized while you are starting the engine, and while the engine is being turned over by the starter. The house battery solenoid needs to be energized all the time while the engine is running.
If Possible Use the Fuse Panel to Power Your Solenoid
Your vehicle should have a fuse panel under the hood or behind a plastic lid under the dashboard.
Take a test light and determine which fuses are energized while the engine is running but are disconnected when the engine is off.
Once you find a suitable fuse slot, use the male end of a spade terminal to wire 12 V power to your solenoid with 16 AWG wire.
The male half of the spade terminal will plug right into a vacant fuse slot on most vehicles.
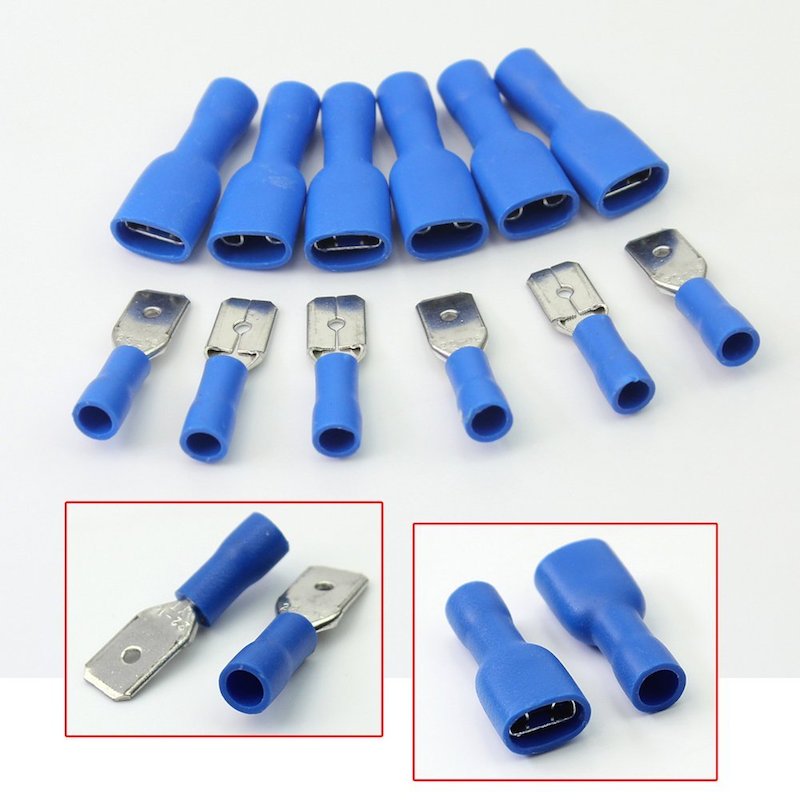
Use the male end of these spade connectors to plug into an open space on your van's fuse board
Another option, which I set up in my Dodge Caravan, is to use a standalone 12 V power socket that is only energized with the engine running.
Some vehicles don't have extra 12 V power sockets, so it's always a safe bet to wire directly to the fuse panel. Here's another example of how to wire a solenoid by eTrailer. The solenoid you buy might have a 4th connection for a ground.
With the solenoid breaking the connection to the house batteries while the engine is off, you'll never again accidentally run the start battery down while watching TV at night!
Recommended Battery Types and Wire Gauges
I would recommend you install two batteries for your living quarters along with an inverter rated to 1,500 watts. 2,000 watts would be even better.
Inverters change the 12 V direct current from the batteries to 110 V alternating current (AC) used by your appliances. You can read more about inverters here.
Many electrical devices will state they only require 300-400 watts. In reality their start up surge will take 3-4 times more than that.
The wiring between the two batteries, and also from the batteries to the inverter, needs to be automotive battery cable size.
I'd recommend using 2 AWG copper wire. This site provides a nice chart with recommended cable sizes for various inverters.
Don't be afraid to pay up for real copper wires rather than cheaper copper-coated aluminum wires.
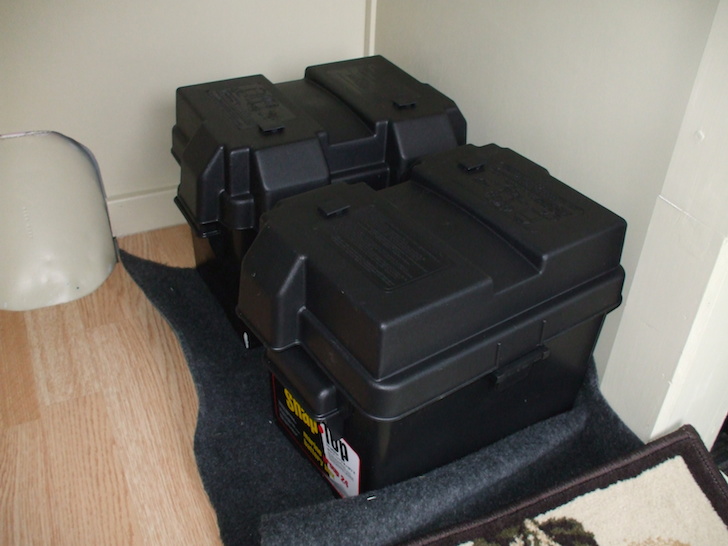
Two house batteries connected in parallel in my van
Your inverter is a heavy electrical draw. For the batteries to discharge together equally, the cables connecting the batteries to each other and to the inverter should be made with the same type and size of cable.
The charge line coming from your van start battery to the secondary house batteries can be considerably lighter in size. I recommend 10 AWG wire run from the positive terminal of your start battery to the continuous duty solenoid.
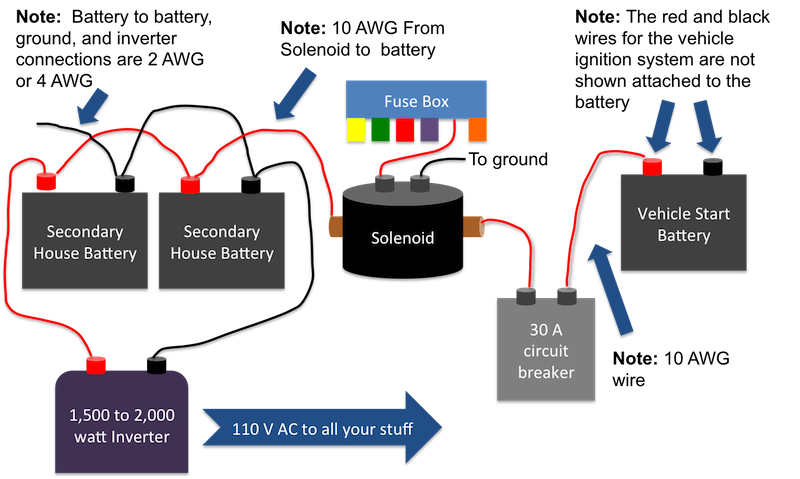
How to Wire the Solenoid, Start Battery, and Secondary Battery Bank
There are two large terminals on the solenoid. Connect one terminal to the 10 AWG wire coming from the van battery and use another length of 10 AWG wire from the solenoid to the secondary battery bank.
How to Wire a Stealth Camper Van
How to wire your stealth camper van
The two smaller terminals on the solenoid are for 12 V power from the fuse box and a connection to ground.
Near the secondary batteries install a 30 amp automatically resetting circuit breaker to protect the wiring going to the house batteries. You might place this between the vehicle battery and the solenoid.
The house batteries need to be situated close to each other, but can be anywhere in the van.
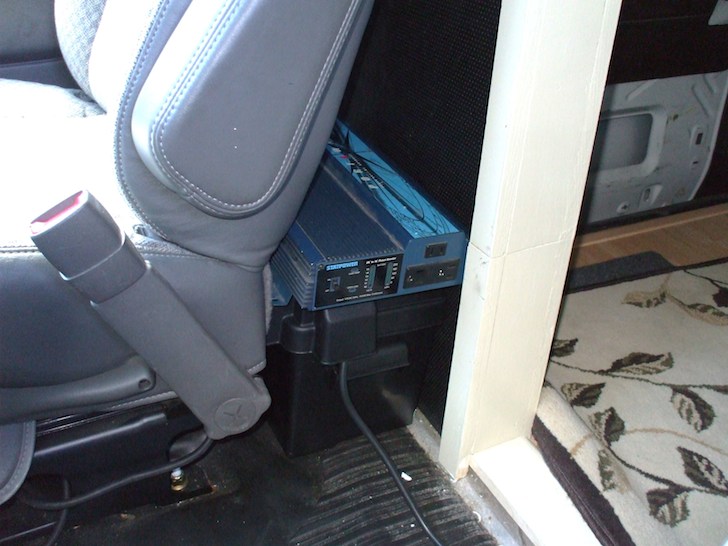
Inverter directly on top of battery box.
In addition, the inverter needs to be mounted as close to the house batteries as possible. In this example it is directly on top of the battery box.
Your Needs Determine Further Complexity
What I've described so far are the basics of your 12 V DC and 110 V AC electrical system.
How you proceed from here will be determined by how simple or complicated you wish to make your own setup.
Keep Your Setup Simple
Inverters come with standard 110 V sockets that you'd find in any building in the US.
If your needs are simple, you can just run a single power strip into the living compartment. The strip comes with built-in protection against voltage spikes or excessive draw.
In many ways this is the ideal setup because there is no wiring to run and it's simply plug and play.
NOTE: If you use extension cords, always use three-wire cords to provide proper ground protection.
For the most part you'll only be using one or two items at a time, so it's unlikely you'll pull too many amps.
I recommend going this easy route because installing electrical wiring in boxes, with proper covers and grounds, is a much more complex process.
You'll need to provide circuit breakers for each 110 V AC circuit.
Power strips take all the worry away because they come ready to use with protection already in place.
Additional Considerations
More and more devices these days are able to run directly off 12 V DC. It will be to your advantage to install a few standard 12 V power sockets. You'll need to run both positive and negative wires unless you have access to the metal structure of the van for a ground connection.
Each socket should be wired with 12 AWG wire and fused no higher than 20 amps. This current level may be too high for many sensitive small electronics, so be careful what you plug in to these outlets.
Depending on what you want to use, you might be able to get away with 14 AWG wire and 10 amp fuses.
Lighting
Setting up your lighting doesn't take long once you setup your batteries, solenoid, and inverter.
LEDs don't use much power, and if you buy individual battery-powered lights you don't even need to do any wiring.
Round tap-on/off LED lights can be fastened in a number of spots throughout the van. You will be amazed how many hours of light you can get from a few AAA batteries this way.
Solar Panels
If you're expecting to spend most of your time off grid, you can install a solar panel or two on the roof. During the day you'll charge the batteries just sitting out in the sun. If you feel the need to plug into a source of power, add a 110 V power cord.
Without an RV roof air conditioner, you won't need a heavy duty 30 amp cord that standard RVs require.
A/C and Microwave
Since your van camper is a smaller vehicle, a 5,000 BTU window A/C will be more than enough to cool it. You can run this A/C unit through your standard 15 amp circuit.
For the sake of convenience I highly recommend purchasing a low wattage microwave. Many truckers use one of these and they're a real life-saver on the road.
Conclusion
Now that you understand how to wire a basic two battery system in parallel and connect it to your vehicle's alternator, you can safely turn your van into a livable space.
Your options are only limited by your imagination.
My advice is to keep your van wiring as simple as possible in the beginning. Only add a 12 V circuit or additional outlets once you get the hang of van living.
Your needs may be fewer than you imagined!
Love RVing? You'll Love RV LIFE Pro
It's the wanderlust, the freedom of the open road. It's not the destination, but the journey. It's exploring the world. You don't need a house because when you travel, you're home. That's RV LIFE.
The problem is, planning epic RV journey is somewhat complex. At RV LIFE, we believe it should be simple. As RVers ourselves, we understand the process and have helped millions of RVers journey with confidence and make their travel dreams come true.
RV Trip Wizard helps you plan the perfect trip and our RV GPS app turns your phone into an RV Safe GPS to get you there safely. Have a question about ANYTHING related to RVing, join the conversation at any of our awesome RV forum communities.
Step 1: Click here to learn more and sign up for the free trial.
Step 2: Plan your dream RV trip.
Step 3: Enjoy unforgettable memories!
Source: https://www.doityourselfrv.com/bring-van-camper-life-add-batteries-solenoid-stealth-rv/
0 Response to "How to Install a Continuous Duty Solenoid to Charge a Battery"
Post a Comment